


Centos7 最全配置
简介
Linux/Centos7 安装与配置。
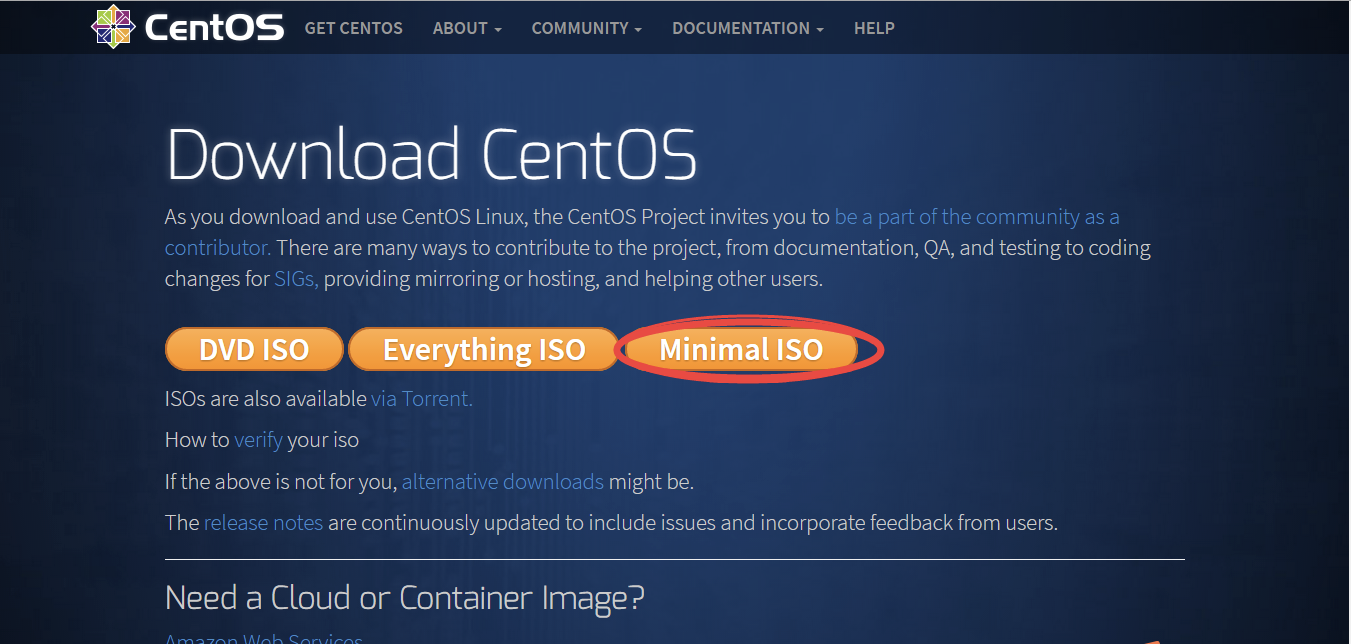
使用教程
基础工具
# 基础依赖
yum install -y curl \
			   wget \
			   iftop \
			   perl \
			   net-tools
常用工具
安装 ifconfig
先查看是否有文件,如果文件不存在就说明该系统未安装 ifconfig
ls /sbin/ifconfig
安装
yum install ifconfig
如果安装失败,提示缺少安装包,可以先搜索对应的安装包再进行安装
yum search ifconfig
yum install net-tools.x86_64 -y
安装 telnet
yum install -y telnet-server
安装 ssh
yum install -y openssh-server
安装 vim
先查看系统是否已经存在 vim
rpm -qa | grep vim
执行第一条命令一键全部卸载,或者执行下面命令加上查询到的程序名依次卸载,建议用上面那种,一键很方便。
rpm -qa | grep vim | xargs rpm -e --nodeps
# 或
rpm -ev --nodeps [包名]
执行命令安装 vim
yum -y install vim*
安装 lrzsz
yum install -y lrzsz
安装 git
yum install -y git
安装 nslookup
yum install bind-utils
基础设置
检查系统编码(可选)
查看系统字符集是否为 zh_CN.GB18030,一般的话默认都是 zh_CN.UTF-8
locale
更改系统编码为 zh_CN.GB18030
vi /etc/locale.conf
让修改的编码立即生效
source /etc/locale.conf
设置静态 IP
执行命令先查看当前服务器网卡配置信息,找到网卡名称。
ifconfig
# 或
ip addr
执行命令查看该网卡的配置文件,注意 ifcfg-xxx,那里输入服务器的网卡名称,每个服务器可能会不一样。
修改或新增配置文件内容
BOOTPROTO="static"
ONBOOT="yes"

# 新增
IPADDR=172.17.254.200
PREFIX=24
GATEWAY=172.17.254.1
DNS1=172.17.254.1
执行命令重启网卡,再次查看 ip 发现生效
systemctl restart network
vi /etc/sysconfig/network-scripts/ifcfg-enp3s0
关闭 SELinux(可选)
安全增强型 Linux(Security-Enhanced Linux)简称 SELinux,学精难度较大,建议关闭
检查 SELinux 状态是否开启
/usr/sbin/sestatus -v
# 或
getenforce
修改配置文件,并将 SELINUX 参数修改为 disabled,保存后重启服务器生效
vi /etc/selinux/config
# 注释掉下面两行
# SELINUX=enforcing
# SELINUXTYPE=targeted
# 增加一行
SELINUX=disabled

# 使设置启用
# 在这里最好重启一下系统,也可以稍后重启
setenforce 0
设置防火墙
firewall 是 centos7 里面的新的防火墙命令,它底层还是使用 iptables 对内核命令动态通信包过滤
简单理解就是 firewall 是 centos7 下管理 iptables 的新命令
查看防火墙状态
systemctl status firewalld
查看可访问端口 (重启防火墙生效,可通过此命令查询)
firewall-cmd --zone=public --list-ports
添加可访问端口
firewall-cmd --zone=public --add-port=3306/tcp --permanent
关闭可访问端口
firewall-cmd --zone=public --remove-port=3306/tcp --permanent
重启防火墙
systemctl restart firewalld
开启防火墙
systemctl start firewalld
关闭防火墙
systemctl stop firewalld
开机自启动防火墙
systemctl enable firewalld
开机禁用防火墙
systemctl disable firewalld
修改 ssh 端口
将 #Port 22 前面的 #号去掉 ,然后将 22 改成需要设置的端口即可
vi /etc/ssh/sshd_config
重启 sshd 服务
service sshd restart
专用工具
安装 Java
先查看系统已经安装好的 java
rpm -qa | grep java
执行第一条命令一键全部卸载,或者执行下面命令加上查询到的程序名依次卸载,建议用上面那种,一键很方便。
rpm -qa | grep java | xargs rpm -e --nodeps
# 或
rpm -ev --nodeps [包名]
安装 1.8 版本的 java 所有程序包,安装不同的版本就修改 java-1.8.0-openjdk*
yum -y install java-1.8.0-openjdk*
输入命令查看 java 是否安装成功
java -version
操作指南
FAQ
CentOS7系统更换软件安装源
yum 出现could not retrieve mirrorlist 错误_centos7 yum could not retrieve mirrorlist
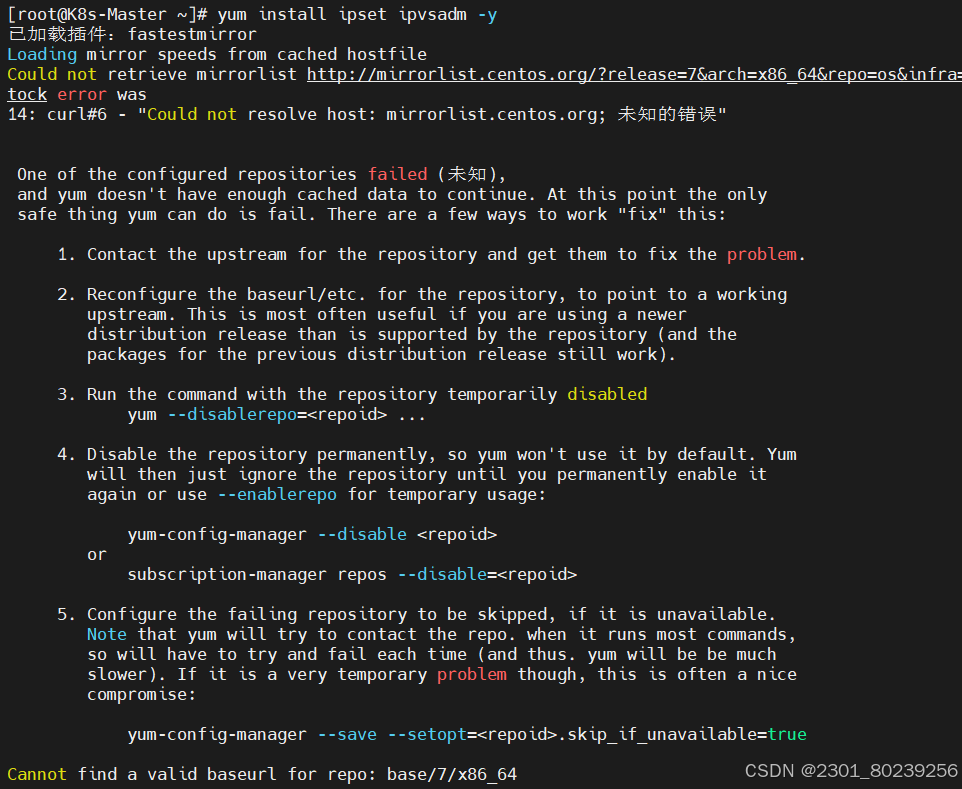
问题描述:
Yum 仓库访问失败,节点无法解析 CentOS 官方镜像站域名,导致无法安装必要的网络工具(ipset/ipvsadm)。
原因分析:
可能是网络或者yum没有安装。检查后发现不是这的原因。然后又查看日志发现报错为未正常访问镜像源。重新下载后问题解决。
解决方案:
- 重新配置yum源
删除原有的 yum 源配置文件:进入 /etc/yum.repos.d/ 目录,删除该目录下的所有文件(建议先备份或移动到其他位置,以防万一)
#cd 到该目录下
cd /etc/yum.repos.d/
#备份yum.repos.d
cp -r /etc/yum.repos.d /etc/yum.repos.d.bak
备份这三个文件就行了
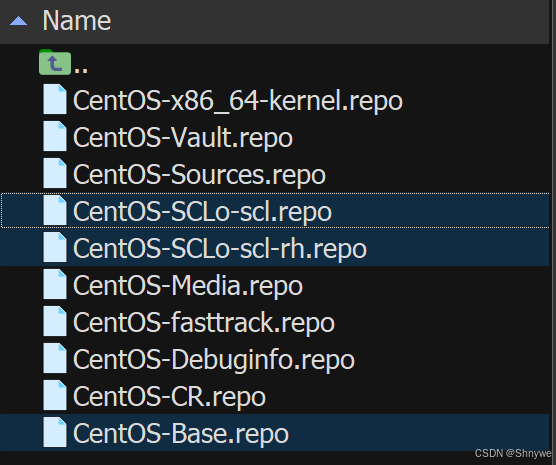
注意!!很多人只有 CentOS-Base.repo 文件,没有后两个,这也没问题,有几个备份几个,不用额外创建!
- 重新下载合适的 yum 源
例如,如果使用阿里云的源,可以执行以下命令下载 CentOS 的 base 源和 epel 源(需要 root 权限)
wget -O /etc/yum.repos.d/CentOS-Base.repo http://mirrors.aliyun.com/repo/Centos-7.repo
wget -O /etc/yum.repos.d/epel.repo http://mirrors.aliyun.com/repo/epel-7.repo
- 清理 yum 缓存
yum clean all
- 重新生成 yum 缓存
yum makecache
- 更新软件包
yum update
如果无法下载 yum 源配置,可尝试手动修改
- 编辑CentOS-Base.repo 文件(必选)
# CentOS-Base.repo
#
# The mirror system uses the connecting IP address of the client and the
# update status of each mirror to pick mirrors that are updated to and
# geographically close to the client.  You should use this for CentOS updates
# unless you are manually picking other mirrors.
#
# If the mirrorlist= does not work for you, as a fall back you can try the
# remarked out baseurl= line instead.
#

[base]
name=CentOS-$releasever - Base
baseurl=https://mirrors.aliyun.com/centos/$releasever/os/$basearch/
gpgcheck=1
gpgkey=https://mirrors.aliyun.com/centos/RPM-GPG-KEY-CentOS-7

#released updates
[updates]
name=CentOS-$releasever - Updates
baseurl=https://mirrors.aliyun.com/centos/$releasever/updates/$basearch/
gpgcheck=1
gpgkey=https://mirrors.aliyun.com/centos/RPM-GPG-KEY-CentOS-7

#additional packages that may be useful
[extras]
name=CentOS-$releasever - Extras
baseurl=https://mirrors.aliyun.com/centos/$releasever/extras/$basearch/
gpgcheck=1
gpgkey=https://mirrors.aliyun.com/centos/RPM-GPG-KEY-CentOS-7

#contrib - packages by Centos Users
[centosplus]
name=CentOS-$releasever - Plus
baseurl=https://mirrors.aliyun.com/centos/$releasever/centosplus/$basearch/
gpgcheck=1
enabled=0
gpgkey=https://mirrors.aliyun.com/centos/RPM-GPG-KEY-CentOS-7
或者
# CentOS-Base.repo
#
# The mirror system uses the connecting IP address of the client and the
# update status of each mirror to pick mirrors that are updated to and
# geographically close to the client.  You should use this for CentOS updates
# unless you are manually picking other mirrors.
#
# If the mirrorlist= does not work for you, as a fall back you can try the
# remarked out baseurl= line instead.
#

[base]
name=CentOS-$releasever - Base - mirrors.aliyun.com
failovermethod=priority
baseurl=http://mirrors.aliyun.com/centos/$releasever/os/$basearch/
        http://mirrors.aliyuncs.com/centos/$releasever/os/$basearch/
        http://mirrors.cloud.aliyuncs.com/centos/$releasever/os/$basearch/
gpgcheck=1
gpgkey=http://mirrors.aliyun.com/centos/RPM-GPG-KEY-CentOS-7

#released updates
[updates]
name=CentOS-$releasever - Updates - mirrors.aliyun.com
failovermethod=priority
baseurl=http://mirrors.aliyun.com/centos/$releasever/updates/$basearch/
        http://mirrors.aliyuncs.com/centos/$releasever/updates/$basearch/
        http://mirrors.cloud.aliyuncs.com/centos/$releasever/updates/$basearch/
gpgcheck=1
gpgkey=http://mirrors.aliyun.com/centos/RPM-GPG-KEY-CentOS-7

#additional packages that may be useful
[extras]
name=CentOS-$releasever - Extras - mirrors.aliyun.com
failovermethod=priority
baseurl=http://mirrors.aliyun.com/centos/$releasever/extras/$basearch/
        http://mirrors.aliyuncs.com/centos/$releasever/extras/$basearch/
        http://mirrors.cloud.aliyuncs.com/centos/$releasever/extras/$basearch/
gpgcheck=1
gpgkey=http://mirrors.aliyun.com/centos/RPM-GPG-KEY-CentOS-7

#additional packages that extend functionality of existing packages
[centosplus]
name=CentOS-$releasever - Plus - mirrors.aliyun.com
failovermethod=priority
baseurl=http://mirrors.aliyun.com/centos/$releasever/centosplus/$basearch/
        http://mirrors.aliyuncs.com/centos/$releasever/centosplus/$basearch/
        http://mirrors.cloud.aliyuncs.com/centos/$releasever/centosplus/$basearch/
gpgcheck=1
enabled=0
gpgkey=http://mirrors.aliyun.com/centos/RPM-GPG-KEY-CentOS-7

#contrib - packages by Centos Users
[contrib]
name=CentOS-$releasever - Contrib - mirrors.aliyun.com
failovermethod=priority
baseurl=http://mirrors.aliyun.com/centos/$releasever/contrib/$basearch/
        http://mirrors.aliyuncs.com/centos/$releasever/contrib/$basearch/
        http://mirrors.cloud.aliyuncs.com/centos/$releasever/contrib/$basearch/
gpgcheck=1
enabled=0
gpgkey=http://mirrors.aliyun.com/centos/RPM-GPG-KEY-CentOS-7
- 编辑 CentOS-SCLo-scl-rh.repo 文件(如果没有这个文件,不用管)
替换内容: ***注意哦!!!***这里不是全部替换,只替换【centos-sclo-rh】下面的内容
[centos-sclo-rh]
name=CentOS-$releasever - SCLo rh
baseurl=https://mirrors.aliyun.com/centos/$releasever/sclo/$basearch/rh/
gpgcheck=1
enabled=1
gpgkey=https://mirrors.aliyun.com/centos/RPM-GPG-KEY-CentOS-7
- 编辑 CentOS-SCLo-scl.repo 文件(如果没有这个文件,不用管)
[centos-sclo-sclo]
name=CentOS-$releasever - SCLo sclo
baseurl=https://mirrors.aliyun.com/centos/$releasever/sclo/$basearch/sclo/
gpgcheck=1
enabled=1
gpgkey=https://mirrors.aliyun.com/centos/RPM-GPG-KEY-CentOS-7